A proper foundation supports the entire structure, keeps it level, and protects against moisture, rot, and shifting over time. Many DIY builders focus on walls and roof but underestimate how critical a solid base proves for long-term success. This guide covers the most practical foundation types for garden sheds, with clear steps to help you choose and install the right one based on your budget, soil, and shed size. A well-built foundation extends the life of your shed and prevents headaches like doors that stick or floors that sag.
Why a good shed foundation matters
Without a stable base, even the best-framed shed can develop problems within a few seasons. Water pooling underneath causes wood rot, while uneven settling leads to cracks in siding or roof leaks. Good drainage and proper elevation keep the floor dry and the structure square. Most garden sheds under 120 square feet work fine with simpler on-grade options, while larger or permanent ones may need more robust methods.
Check local codes before starting. Some areas require permits or frost-line footings even for small sheds.
Choosing the right foundation type
| Foundation Type | Best For | Cost Level | Difficulty |
|---|---|---|---|
| Gravel Pad with Timber Frame | Most garden sheds | Low to Medium | Easy |
| Concrete Blocks on Gravel | Small to medium sheds | Low | Easy |
| Full Poured Concrete Slab | Larger or heavy-use sheds | High | Medium to Hard |
Gravel shed pad with timber frame
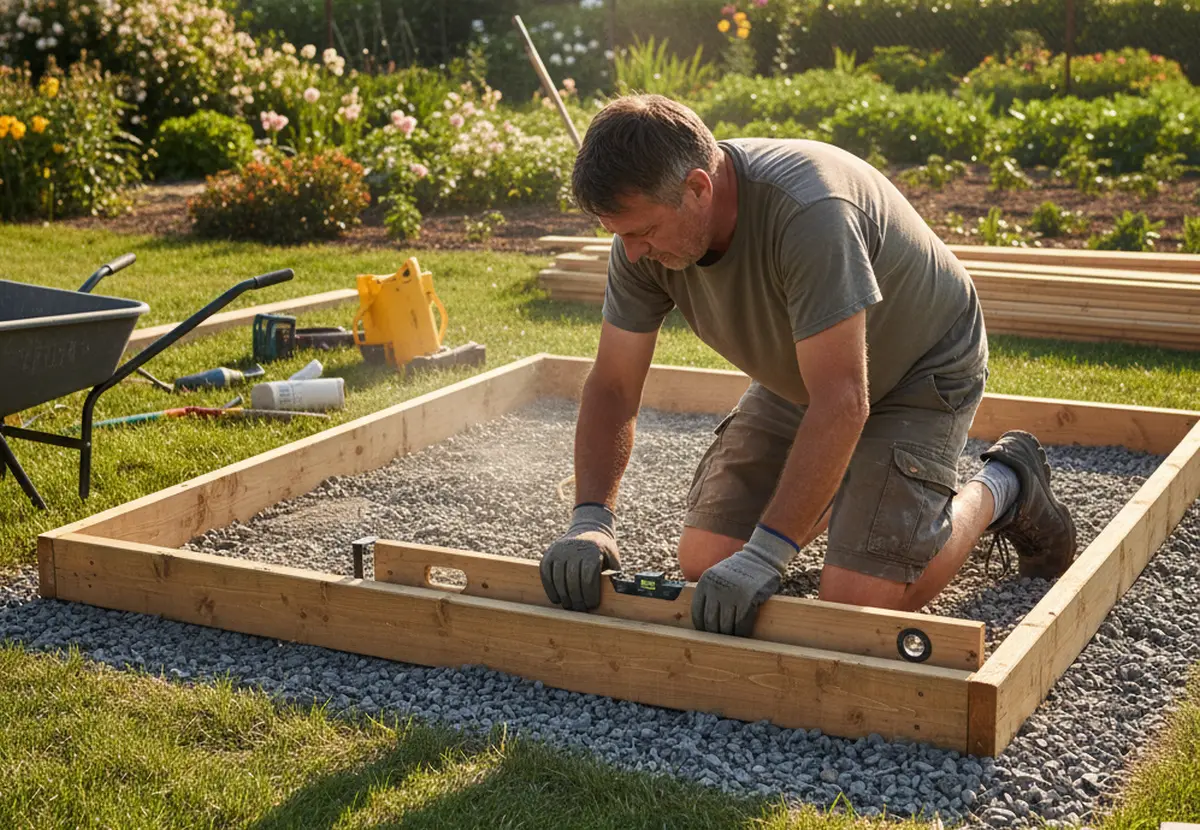
This popular option offers excellent drainage and works on slightly uneven ground. Excavate 4 to 6 inches deep across an area 1 to 2 feet larger than your shed. Add landscape fabric, then fill with 4 inches of compacted gravel or crushed stone. Build a rectangular frame using pressure-treated 4×6 or 6×6 timbers with half-lap corners. Level the frame carefully and fill the interior with more gravel. The shed floor sits directly on the timber frame.
Step-by-step: Concrete block foundation
Mark the shed outline with stakes and string. Dig down 4 inches and add 4 inches of compacted gravel. Place solid concrete blocks in a grid pattern every 4 to 6 feet, depending on shed size. Use a long level and straight board to ensure all blocks sit perfectly even. Adjust with more gravel or sand as needed. Pressure-treated skids or floor joists rest directly on the blocks.
- Space blocks 16 to 24 inches apart under joists
- Check level in multiple directions
- Add plastic shims for fine adjustments
- Secure the shed floor to blocks with brackets
Building on a concrete slab
For maximum durability, pour a 4-inch reinforced concrete slab. Excavate 8 inches deep, add 4 inches of gravel, then build wooden forms. Install rebar or wire mesh for strength. Pour concrete, screed it level, and finish the surface. Allow full curing time before framing. This method works best for workshops or sheds storing heavy equipment.
Deck block foundation
Plastic or concrete deck blocks sit on gravel pads and accept posts or beams. Ideal for sloped yards when combined with adjustable posts. Place blocks at corners and along perimeter, level them, then build your floor frame on top. This system allows easy future relocation if needed.
Additional foundation tips
Always elevate the shed floor at least 4 to 6 inches above surrounding ground. Slope the site slightly away from the structure for water runoff. Use pressure-treated lumber for any wood in contact with ground or gravel. Consider soil type—clay soils need better drainage than sandy ones. For sloped yards, stepping the foundation or using longer posts keeps everything level.
Add ventilation under the floor when possible to reduce moisture buildup. Install termite shields or barriers in high-risk areas.
Linking to your shed build
Once your foundation is complete and perfectly level, you can move confidently into framing walls and installing the roof as described in our main guide: How to Build a Shed in Your Garden. A strong base makes every subsequent step easier and produces better results overall. Take time to get the foundation right—it forms the literal groundwork for your entire project.
Building a reliable shed foundation saves money and frustration down the road. Choose the method that matches your skill level and site conditions, then follow through with careful leveling and proper materials. Your garden shed will stand straight and dry for many years with this critical first step completed correctly.

- How to Build a Shed Foundation: 6 Strong Options for Your Garden Shed - May 20, 2026
- How to Build a Shed in Your Garden: Complete DIY Guide - May 19, 2026
- 20 vegetables to sow in April for a bountiful home garden harvest - March 30, 2026